Showing posts with label Dessert. Show all posts

Roasted Pumpkin w/ Walnut & Shredded Chocolate


Ok, and a scoop of ice cream! This may not be the healthiest of things, but it's a dessert on a mission! To make me happy :)

Ingredients
  • 1/4 Kent pumpkin, sliced in half
  • 1-2 tbsp Vegetable oil
  • 1-2 tbsp Butter
  • 2-3 tbsp Brown sugar
  • Walnuts, crumbled
  • Shredded chocolate (to taste)
  • 1 scoop, Vanilla ice cream
Directions
  1. Preheat oven to 400F (200C). 
  2. On a cookie sheet, lay aluminum foil down (easier to clean). Score the (2) 1/8 slices of pumpkin to allow even cooking and then rub with vegetable oil until coated. Bake at 400F for 30-60 mins, or until a fork pierces through the pumpkin easily. 
  3. When done, turn the oven off, pull the cookie sheet out and rub the butter over the pumpkin with a spoon or fork (it will be hot). Sprinkle the brown sugar, walnuts, and shredded chocolate on top and put it back in the (off) oven for 5-10 mins. 
  4. Pull it out and top with a scoop of ice cream! 
You now have one amazingly delicious and easy dessert to enjoy! It's one of my favs ;)
Cheers!

Black Sapote (Chocolate Pudding Fruit)


This is a black sapote. It doesn't look that special, but what's inside is worth gold.
Why? It tastes like chocolate pudding.


On a spur-of-the-moment trip to Byron Bay (NSW, Australia), we spotted a random "theme park" tucked away in the water-slide and roller coaster parks scattered around the Gold Coast. A giant sign on the side of the freeway read "TROPICAL FRUIT WORLD".....tropical fruit world? WTF? If this is Australia's equivalent of the USA's giant ball of twine? If so, I'm in! We ventured our way to this mysterious destination to learn it has the world's largest variety of tropical fruit (insert: hell yes), complete with tastings of the unique fruits, orchard tours, and even kangaroos and koalas. We left with a few interesting fruits such as the abiu (tastes like vanilla custard) and rollinia (tastes like lemon merengue pie)...but the black sapote was probably my favorite!

A black sapote is a type of persimmon native to Mexico and Central America. It is more commonly known as the "chocolate pudding fruit," due to the flavor, consistency, and color of the inside. The fruit is about 2-4 inches in diameter and soft when ripe. The info provided at Tropical Fruit World stated it was best eaten with ice cream. Being a chocoholic, I had my doubts...but I must confess, the claims were spot-on and the black sapote will forever be on my purchase list if/when I see it again! This decadent fruit seems to melt in your mouth and has a cocoa flavor. It's not that sweet, nor is it tart, which is why a little ice cream or vanilla agave (something sweet) goes so well with it. 

We tried the two popular versions: a black sapote smoothie and spoonfuls of black sapote with ice cream. Smoothies are wonderful, but the fruit and ice cream choice was the winner! The ice cream complemented the fruit with each bite whereas the smoothie diluted the fruits delicate flavor. 

When you find one, this is the easiest way to prepare it...

Ingredients
  • 1 ripe Black Sapote
  • Vanilla Bean ice cream, few scoops
Directions
  1. Slice the black sapote like an avocado - around the central "pit." Twist and separate the halves and de-seed the fruit (almond-sized seeds in the middle). 
  2. Scoop some ice cream in to a bowl and then scoop out as much of the black sapote as you can and put it in with the ice cream! Or you can scoop out some ice cream and black sapote individually...but definitely eating the ice cream and black sapote in the same bite is the winner! 
Slicing the black sapote.

Slicing around like an avocado.

Twist and pull the two halves.

Pick out the large seeds in the middle.

The seeds in the middle. If you twist and pull just right, it'll all go to one side, like above!

What the "pit" looks like...a bunch of large seeds.
Note: you can eat the fruit around the seeds!

Scoop out and eat with ice cream! (we ate it all before we could get photos, sorry)
Black sapote smoothie.
We also purchased some local macadamia nuts.
The rollinia fruit, also from Tropical Fruit World.
After searching the web, I found a few recipes showcasing the black sapote:


We'll have to find some more black sapotes and try these recipes :)


For more info: Tropical Fruit World.

Keywords: tropical fruit world, australia, nsw, gold coast, black sapote, rollinia, abiu.

Pumpkin Pasties & Butterbeer


Since it's the grand finale of the Harry Potter movies, we're doing a marathon and I thought it'd be fun to add some HP snacks! The butterbeer is dairy-free and has a little more alcohol than the house-elf standards in Harry Potter ;)


The pumpkin pasties are pretty simple, but need a little prep time since the filling is pre-cooked. I tailored my favorite pumpkin pie and crust recipe to fit into a pumpkin pasty, which came out perfectly. However, finding a butterbeer recipe that fit J.K. Rowling's description was a little bit of a task, so I adjusted a few of the "best" butterbeer recipes online to make one buttery, foamy, alcoholic beverage that's served warm! The biggest complaints with the top recipes online was basically that they were too sweet and non-alcoholic. I cut back on the sugar proportions and cranked up the booze, but not enough to distort the overall butterscotch flavor :] Try it out and let me know what you think! I'll be testing another butterbeer recipe when I'm in the mood for some HP and butterbeer!

Serves 4-6 (1 dozen small pasties, 4-6 cups butterbeer)

Ingredients
  • Pumpkin Pasties
    • Pumpkin Filling
      • 425g cooked pumpkin, blended smooth (or 1 can of pumpkin, 15-oz size)
      • 1 (14-oz) can Sweetened Condensed Milk (equivalent to 395 g)
      • 2 large eggs 
      • 1-2 tsp ground cinnamon 
      • 1/2-1 tsp ground ginger 
      • 1/2-1 tsp ground nutmeg  
      • 1/2 teaspoon salt 
    • 1 (9 inch) unbaked pie crust
      • 1 cup all-purpose flour 
      • 1/4 cup and 3 tablespoons shortening 
      • 2-1/4 teaspoons white sugar 
      • 1/2 teaspoon salt 
      • 1/4 egg (optional, if available)
      • 2 tablespoons water
  • Hot Butterbeer
    • 1 liter vanilla cream soda (we had to use ginger beer) 
    • 2 tbsp butter 
    • 2 tbsp brown sugar
    • 1 (375ml) can soy cream
    • 2 tsp vanilla extract (to add the vanilla flavor to our ginger beer)
    • 1/3 to 1/2 cup Butterscotch Schnapps, to taste
    • 1/4 cup spiced rum, to taste (we used Sailor Jerry's, which has an excellent vanilla flavor)
    • Salt, to taste
    • Optional: non-dairy whipped cream, if available!
Directions
  1. Preheat oven to 425F (220C). Whisk pumpkin, sweetened condensed milk, eggs, spices and salt in medium bowl until smooth. Pour into casserole dish. Bake 15 minutes. 
  2. Reduce oven temperature to 350F (175C) and continue baking 35-40 minutes or until knife inserted 1 inch from casserole dish wall comes out clean. While the pumpkin filling is baking, prepare the crust in the next step.
  3. In a large mixing bowl, combine all-purpose flour, shortening, sugar, and salt. Blend together with a pastry cutter until crumbly. In a separate, smaller bowl, mix egg with water. Blend into flour mixture. Chill in refrigerator until ready to use.
  4. When the pumpkin filling is ready, set aside to cool and take out the crust dough to prep. Separate the dough in to 12 even pieces. Roll thin and cut into circles approx 4" in diameter. Put a spoonful of the cool pumpkin mixture towards one side of the center of the circle. Fold over the crust into a half-circle and firmly crimp the edges closed with a fork. Slice three small slits in the top for venting, place on a greased cookie sheet, and bake only until crust is a light golden-brown (10-15 mins at 350F/175C). While that's baking, whip up the butterbeer in the next steps!
  5. Put the soda in a pan to boil. In a separate small pan, melt the butter and brown sugar together until the sugar has dissolved. Pour the butter and sugar mixture into the pan of boiling cream soda (make sure the soda is boiling, or the butter and sugar will solidify). Add 2/3 of the can of soy cream and 1 teaspoon vanilla extract. Add the butterscotch schnapps and spiced rum to your preferred strengths/flavors. Turn heat to low, just to keep warm. Don't forget to check on your pumpkin pasties - they should be done or close to done around this point. 
  6. Whip up the remaining 1/3 can of soy cream. Slowly add the remaining 1 tsp of vanilla extract until foamy. Note: it's hard to "whip" soy cream, hence a non-dairy whipped "cream" would be handy for the butterbeer foam.
  7. Ladle the warm butterbeer in to a mug and spoon the foam on top. Sprinkle with a little salt to bring out the flavors and enjoy with a pumpkin pasty!
Harry Potter marathon snacks :]

Pumpkin Pasties

Butterbeer


Subnote: I really want to try this butterbeer recipe next (traditional British style a la Harry Potter)...but add the foamy whipped top to it. 

Fried Pumpkin w/ Vanilla Sugar Glaze


Oh heck, lets add some chocolate! This was a successful dessert that the bf surprised me with (due to the recent pumpkin obsession)...and it was perfectly fried and cooked through! I've never had fried pumpkin until now, and I must say....I might start looking like Paula Deen, but I could eat fried pumpkin for the rest of my life.


Serves 2.

Ingredients
  • Pumpkin, cut into approximately 3cm cubes (as close as you can get it)
  • Egg wash
  • 1 part Panko bread crumbs
  • 1 part all purpose flour
  • 1/4 part powdered sugar
  • 2-3 tsp freshly grated nutmeg (always freshly grate your nutmeg!)
  • 2-3 tsp ground cinnamon
  • 2-3 tsp ground mace
  • 2-3 tsp ground clove
  • 2-3 tsp allspice
  • 1-2 tsp ground fennel (optional)
  • 1/2 cup sour cream
  • an additional 1/2 cup powdered sugar
  • 2 tsp vanilla extract
Directions
  1. Prepare a large deep fryer on slightly more than medium heat.
  2. Take all the dry ingredients (everything from the Panko to the fennel, inclusive) and thoroughly mix together in a large bowl and then spread out onto a large plate.
  3. Take the pumpkin pieces (making sure they are room temperature to start) and place them in the egg wash, coating all surfaces. Dredge through the flour mixture until coated, and then place in the egg wash again, and dredge one more time (this makes for an extra crispy crust).
  4. Once the oil is hot, add the pieces in, just a few at a time (the more oil you have the more you can do at a time - they key is to make sure the oil doesn't get too cold from adding in too many pieces).
  5. Remove, letting the oil drain, and set aside on a paper towel covered plate.
  6. In a small bowl add the sour cream, sugar, and vanilla and beat until thoroughly incorporated and smooth.
  7. Plate the pumpkin, adding a piece of chocolate if you like, and drizzle with the sour cream mixture.
  8. Bon ap!
The vanilla sugar glaze is a must here!

Mini Apple Pie


A belated “Pi Day” tribute ;) Today I’m sharing with you my 3 secrets to my perfect apple pie recipe, used for years and is a family fav.

Update: Made it again...and again (read more for updated photos).

First secret: make your own pie crust. The recipe below is the best recipe I’ve come across and the added salt/sugar is essential to the perfect crust flavor. Second secret: I use the famous "Grandmpa Ople" recipe from allrecipes. Third secret: the apples need to be tossed in some spices. If I told you the spices exactly, it wouldn’t be my secret recipe anymore ;) Make this in one pie pan or make individual pies and use ramekins (more fun)!

Chef: the gf.

Serves 2.

Ingredients


    Pie Crust
  • 2 cups all-purpose flour 
  • 1 tsp salt 
  • 1 tbsp + 1.5 tsp sugar (white)
  • 3/4 cup + 2 tbsp shortening 
  • 1/2 egg
  • 1/4 cup ice water
  • 

    Apple Pie Filling
  • 1/4 cup unsalted butter
  • 1 tbsp. and 1-1/2 teaspoons all-purpose flour
  • 2 tbsp. water
  • 1/4 cup white sugar
  • 1/4 cup packed brown sugar
  • 4 Granny Smith apples - peeled, cored and sliced
  • Spices
Directions
  1. Make the pie crust (~1 hr, 15 mins).
    1. Combine flour, salt, and sugar in a food processor; pulse to mix. Add shortening and pulse 6 to 8 times, until mixture resembles coarse meal, with pea size pieces of shortening. In a separate bowl, mix egg with water and then fold in the flour mixture, using a pastry cutter. If you pinch some of the crumbly dough and it holds together, it's ready. If the dough doesn't hold together, add a little water and blend together with a pastry cutter.
    2. Remove dough from machine and place in a mound on a clean surface. Gently shape into 1 large ball, then cut this in half. Roll these two pieces in to balls. Knead the 2 dough balls just enough to form a disc shape, do not over-knead. You should be able to see little bits of butter in the dough. These small chunks of butter are what will allow the resulting crust to be flaky. Sprinkle a little flour around the discs. Wrap each disc in plastic wrap and refrigerate at least 1 hour, and up to 2 days.
    3. Remove one crust disk from the refrigerator. Let sit at room temperature for 5-10 minutes in order to soften just enough to make rolling out a bit easier. Roll out with a rolling pin on a lightly floured surface to a ~6-inch circle; about 1/8 of an inch thick. As you roll out the dough, check if the dough is sticking to the surface below. If necessary, add a few sprinkles of flour under the dough to keep the dough from sticking. Carefully place into a ramekin. Gently press the pie dough down so that it lines the bottom and sides of the ramekin. Use a pair of kitchen scissors to trim the dough to within 1/4 inch of the edge of the ramekin. Do this again for the 2nd ramekin (serving two pies). Save the extra dough and roll that out to use as the pie top.
  2. Make the Pie (~1 hour).
    1. Preheat oven to 425 degrees F (220 degrees C). Melt the butter in a saucepan. Stir in flour to form a paste. Add water, white sugar and brown sugar, and bring to a boil. Reduce temperature and let simmer.
    2. Optional: pie crust pre-bake (I always do this). Place the ramekins with dough in the preheated oven for 3-5 mins to crisp up the interior walls and bottom of crust. Take out and let cool for a few minutes.
    3. Fill with apples, mounded slightly. Gently pour the sugar and butter liquid over the crust. Pour slowly so that it does not run off. Set aside for a few minutes.
    4. Gently place the extra dough onto the top of the pie filling. Pinch top and bottom of dough rounds firmly together. Trim excess dough (if any) with kitchen shears, leaving a small overhang. Fold the edge of the top piece of dough over and under the edge of the bottom piece of dough, pressing together. Flute edges using thumb and forefinger or press with a fork. Score the top of the pie with four 1-inch long cuts, so that steam from the cooking pie can escape. Optional: (I prefer this) paint an egg wash over the top pie crust for a nice shiny finish (using an egg white) and add a dash of cinnamon.
    5. Bake 7 minutes in the preheated oven. Reduce the temperature to 350 degrees F (175 degrees C). Continue baking for 20-25 minutes, until apples are soft. Set aside to cool.
    6. Serve warm in the ramekin or add a scoop of vanilla ice cream to the top and enjoy!
Garnish with the best secret ingredient: Charlie Sheen. Happy 3.14 day!

Sources: Grandma Ruth's Pie Crust, Grandma Ople's Apple Pie.


Updated: round 2!

Adding the Movenpick Vanilla Bean ice cream!
Ready for noms.

Apple pies...good for the <3

Mini Pavlovas w/ Pineapple, Kiwi, & Banana


An Aussie/Kiwi fav, named after the Russian ballet dancer Anna Pavlova after a tour through 1920's Australia and New Zealand. Apparently, it can be tricky getting the merengue to come out right, so after some researching and testing a few times, this recipe works like a charm :)

Double this recipe for a fun dinner party dessert!

Serves 6.

Ingredients

  • 4 egg whites
  • 1 cup caster sugar
  • 2 tbsp cornstarch, sifted
  • 1 tsp white vinegar
  • 1 cup (8 fl oz) cream
  • 1-2 tbsp cream cheese (to taste)
  • 2 tbsp powdered sugar (to taste)
  • 1 tsp vanilla extract
  • 1 Banana, sliced
  • 2 Kiwi fruit, diced
  • 1/3 Pineapple (1 cup)
  • Optional: 1 tsp cream of tartar (emergency back-up)
Directions

  1. Preheat oven to 300°F (150°C). Place room temperature eggwhites in a glass or steel bowl and use an electrical beater to whip, gradually adding the caster sugar until the mixture is stiff and glossy. You’ll know when the meringue is stiff and glossy because the mixture will have tripled in volume and stands up when the beaters are lifted. Note: If you don't have egg beaters and are using a single whipping whisk, like we did, you may need the assistance of the emergency 1 teaspoon of cream of tartar.
  2. Add the cornflour and vinegar and whisk until just combined and the mixture forms stiff peaks. On a baking tray lined with non-stick baking paper, spoon the mixture to form (6) 3-inch diameter cake shapes.
  3. Reduce oven to 250°F (120°C) and bake for 1 hour 20 minutes. Turn the oven off and allow the pavlova to cool completely in the oven. The low heat puffs up the meringue while the long cooking time dries it out to give you a crisp shell.
  4. In a chilled glass or steel bowl, whisk the cream, cream cheese, powdered sugar and vanilla until peaks form. Spread over the pavlova, and top with fresh fruit. Optional: we also drizzled a bit of vanilla bean infused (spiced) rum (i.e. Captain Morgan) over the fruit. Yea, we made that too.
  5. Serve immediately.

Note: Store your pavlova, undressed, in an airtight container at room temperature for up to 5 days.

Piling on the goodness for the bf's birthday breakfast! It's a masterpiece...of love.
Enjoy!

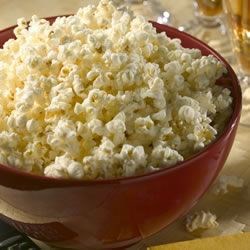
Kettle Corn

Photo courtesy of Allrecipes.com
Wow, this came out great! Just like the authentic stuff...and it only took 5-10 mins.

We kinda ate it all before I could snap a photo, so this is a photo of the recipe I based ours off of.


Ingredients
  • 1/4 cup vegetable oil (we used canola)
  • 3 tbsp peanut oil
  • 1/3 cup white sugar
  • 1/3 cup popcorn kernels
  • Extra sugar and salt
Directions
  1. Heat the oils in a large pot over medium-hot heat, and add 3 popcorn kernels. When they start to pop, the oil is hot enough for step 2.
  2. Stir in the sugar and popcorn. Cover, and shake the pot constantly to keep the sugar from burning. Once the popping has slowed to once every 2-3 seconds, remove the pot from the heat. Sprinkle a little sugar and salt over top and continue to shake for a few minutes until the popping has stopped. 
  3. Pour into a large bowl and allow to cool. Stir occasionally only if you don't want large clumps. Sprinkle with a little more sugar and salt if desired. 
Note: brown sugar can be used instead of white sugar for more of a caramel flavor, but white sugar definitely hit the authentic kettle corn flavor for us.

Vanilla Coconut Ice Cream w/ Raisin


I wanted ice cream. There are 2 problems with this: I'm allergic to dairy and I don't have an ice cream maker...but dairy can be substituted and thanks to the BF's idea, ice cream can be made without a machine.


Problem 1: the dairy was substituted with coconut milk.
Problem 2: become the ice cream making machine using the ziploc baggie method.

Note: I couldn't quite get the coconut milk to an ice cream consistency in the double ziploc bag, but I didn't have enough ice, didn't have rock salt (I used table salt), and I started it from a warm room temperature. Most importantly, it takes coconut milk longer to "cream" than actual cream. I got around it by tossing the whole thing in the freezer and squeezing the bag, mixing the ice cream up, every 20-30 mins or so. However, one of these errors is to blame...I'm not sure which. Yet.

Ingredients
  • 1 gallon-size ziploc bag
  • 1 pint-size ziploc bag
  • 1/2 cup coconut milk
  • 1 tbsp sugar
  • 1/4 vanilla bean (or 1/4 tsp vanilla extract)
  • 1 small box of raisins
  • 6 tbsp rock salt
  • Ice cubes
Directions
  1. Fill the gallon bag half way with ice cubes, and add the rock salt. Put it to the side.
  2. Fill your pint bag with the coconut milk, sugar, vanilla bean (scooped out), and raisins then seal it tight.
  3. Put the pint size bag in the gallon bag then seal the gallon bag tight. 
  4. Shake the bags for about 10 min. until the mixture in the pint size bag has thickened to the ice cream consistency. It may take longer depending on how hard or fast you shake.
  5. Take the pint bag out of the gallon bag and enjoy!
PS, the about.com recipe was terribly sweet. Don't use this unless you want an instant cavity.

Gordon Ramsay’s Espresso Crème Brûlée w/ Vanilla Bean


Lots of research has led us to 3 “perfect” crème brûlée s. This was our first try, using Gordon Ramsay’s “perfect” recipe. However, in our eyes, it isn’t perfect without vanilla bean, so we added 1 seeded vanilla bean in to this recipe. Also, since I’m allergic to dairy (no, not lactose intolerant - allergic), we tried 2 batches of this recipe with 2 different dairy substitutes: soymilk cream and coconut milk. The coconut was a clear winner! We also found that leaving the crème brûlée to sit in the fridge for a day or two allowed it to dry out and form the best custard consistency. Overall, it was “okay,” but it was also my first attempt at crème brûlée. Next time, it’s Anthony Bourdain’s “perfect” crème brûlée attempt. For now, here is Gordon Ramsay’s recipe:
Chef: the gf.
PS, every household needs a kitchen torch ;)

Orange Vanilla Bean Flan


Recipe but with the following 2 adjustments:
  1. Add 1 vanilla bean to milk mixture.
  2. Substitute 1/2 cup (of the 1 cup) heavy cream with soy cream.
It was excellent :) 

Peanut Butter & Jelly Cupcakes

It's peanut butter, jelly time!!!


Happy Birthday, Gabby!


Ingredients
  • 1 3/4 cups all-purpose flour
  • 3/4 tablespoon baking powder
  • 1/2 teaspoon salt
  • 1/4 teaspoon baking soda
  • 1 1/2 sticks unsalted butter, softened
  • 1 1/3 cups sugar
  • 2/3 cup creamy peanut butter
  • 3 large eggs
  • 1/4 cup sour cream
  • 1 cup chopped peanuts (Honey roasted was awesome!)
  • 2 tablespoons milk
  • 1 tablespoon pure vanilla extract
  • 1 cup jam (your favorite flavor-I used Concord Grape)
  • Peanut Butter Frosting (recipe below)
  • Optional: Blackberry Jam
    Peanut Butter Frosting:
  • 1 stick unsalted butter, at room temperature
  • 1 cup creamy peanut butter
  • 2 tablespoons cream cheese, softened
  • 1/2 cup powdered sugar
  • 1 tablespoon vanilla extract

Directions
1. Preheat oven to 350 degrees. Line standard muffin tins with paper liners.
2. Whisk dry ingredients in a large bowl.
3. In another bowl, cream butter, peanut butter and sugar with a mixer until light and fluffy. Add eggs, 1 at a time, beating after each addition. Reduce speed to low. Mix in the sour cream, vanilla, milk and peanuts. Add dry ingredients slowly. Scrape sides of bowl. Divide batter among muffin cups, filling each 2/3 full.
4. Bake cupcakes until testers inserted into centers come out clean, about 20 minutes. Let cool in tins on wire racks.


Frosting Directions
1. Cream the butter, peanut butter and cream cheese together until smooth. Add in the powdered sugar. Stir in the vanilla. Use immediately or refrigerate until needed.

To Assemble
1. When cupcakes are cooled, using a small paring knife, cut out a small hole in the top of each cupcake; discard crumbs (makes good fat kid snack!).

2. Fill a Ziploc bag (or piping bag, if you have one - with a round tip) with the jam. Insert the tip into the center of the cupcake and squeeze the jam inside (you’ll want to apply a decent amount of pressure) until the hole is filled. Repeat until all the cupcakes are filled.


3. Pipe or spread the peanut butter frosting on each cupcake. Optional step: to pipe blackberry jam spirals on top for an extra berry kick! Refrigerate until ready to serve.

Cupcakes will keep, covered, for up to 3 days. Makes approx. 18 cupcakes.


Mango Sticky Rice

This is, hands down, my biggest weakness when it comes to the Thai cuisine: the mango sticky rice! Like many desserts, I want it for breakfast, lunch, and dinner. Sometimes, I just want the mango sticky rice when I order Thai food, and nothing else. But when ordering Thai food, it’s a hit-or-miss on the dessert being freshly made…and if you haven’t tried this dish, freshly prepared mango sticky rice is 10^2 times better! The exotic flavors of the coconut and mango are fresh and enticing, and the ingredients are so simple! I had to test it out in my own kitchen, and it was a win:


Ingredients
  • 1 1/2 cups uncooked short-grain white rice
  • 2 cups water
  • 1 1/2 cups coconut milk
  • 1 cup white sugar
  • 1/2 teaspoon salt  
  • 1/2 cup coconut milk
  • 1 tablespoon white sugar
  • 1/4 teaspoon salt
  • 3 mangos, peeled and sliced
  • 1 tablespoon toasted sesame seeds
Directions
  1. Combine the rice and water in a saucepan; bring to a boil; cover and reduce heat to low. Simmer until water is absorbed, 15 to 20 minutes.
  2. While the rice cooks, mix together 1 1/2 cups coconut milk, 1 cup sugar, and 1/2 teaspoon salt in a saucepan over medium heat; bring to a boil; remove from heat and set aside. Stir the cooked rice into the coconut milk mixture; cover. Allow to cool for 1 hour.
  3. Make a sauce by mixing together 1/2 cup coconut milk, 1 tablespoon sugar, and 1/4 teaspoon salt in a saucepan; bring to a boil.
  4. Place the sticky rice on a serving dish. Arrange the mangos on top of the rice. Pour the remaining coconut milk over the mangos and rice. Sprinkle with sesame seeds.
(Source: allrecipes.com)

Bacon Bourbon Truffles


This was a tedious attempt at a recipe contest (Great Sugardale BAC-ON contest). I didn't get anywhere with it because this is not an easy recipe. However, I got nothing but great feedback regarding the truffles :) If time is your friend and you've got some determination (and patience), then I highly suggest trying these - plus, you get to eat some sizzling bacon and will get a new bottle of bacon bourbon!
Serves: ~30 Truffles


Ingredients
      1. Candied Bacon

  • 1/2 lb bacon
  • 1/2 cup brown sugar
      2. Bacon Bourbon "Ganache"


  • 1/2 cup white chocolate chips
  • 1/3 cup gingersnap cookie crumbs
  • 2/3 cup graham cracker crumbs
  • 3 ounces cream cheese, softened
  • 1/2 cup maple syrup
  • 2 tbsp Bacon Bourbon
  • 1/8 tsp ground cinnamon
  • 1/2 tsp fresh nutmeg, ground
  • 2/3 tsp ground ginger
  • 1 vanilla bean 
  • 1 tsp maple extract
  • Pinch of fine salt
  • Sweet bacon grease (from Candied Bacon)

      3. Maple Caramel "Glaze"

  • 1/2 cups dark maple syrup (Grade A)
  • 1/4 cup half-and-half
     4. Maple Bacon Truffles
  • 11.5oz bag of semi-sweet chocolate chips
  • 1 Drop Liquid smoke 
  • Sugar Crystal sprinkles
  • Sea Salt 
Directions


1. Candied Bacon


Pre-heat oven to 350F degrees. Slice bacon into 1/2 inch strips and dredge in brown sugar until 
thoroughly coated. Crumple aluminum foil to allow for grease drainage and place it on a baking 
sheet. Lay out the bacon on the aluminum foil, making sure not to overlap pieces.
Bake until crispy. Allow to cool and harden before chopping in to bits. Set aside the tin with the 

sweet bacon grease for bacon ganache.

2. Bacon Bourbon "Ganache"


Creamy bacon bourbon ganache filling.
Melt the white chocolate in a double boiler over medium-low heat. Stir often to keep the chocolate from 
burning. Transfer to a large bowl. Add gingersnap and graham cracker crumbs, cream cheese, maple 
syrup, Bacon bourbon, cinnamon, nutmeg, ginger, vanilla bean (scraped), maple extract, salt, and leftover 
bacon grease (from Step 1) and and beat with an electric mixer until smooth. Transfer to a shallow bowl 
and then cover and chill to firm up (about 1-2 hours).

3. Maple Caramel "Glaze"
In a medium saucepan over low-medium heat, bring maple syrup and half-and-half to a simmer. 

Continue simmering the mixture until it reaches 239F on a candy thermometer. Pour the maple caramel 
into a shallow baking dish and set whole dish in a larger baking dish that is filled with warm water, to 
slow the hardening process.

4. Maple Bacon Truffle Set-up
Melt liquid smoke and chocolate in a double boiler over medium-low heat. Paint chocolate in truffle 

molds and set in freezer until firm. Carefully remove the chocolate “shells” from the mold, fill with 
chilled "ganache" leaving some room at the top, and then fill remaining truffle area with chocolate. 
Place in freezer to set. Remove truffles from freezer and stretch some maple caramel on top, along with 
candied bacon bits and sprinkle with sugar crystals and sea salt crystals (50/50) on top.


Enjoy! Goes well with some bacon bourbon on the rocks ;)